Read More Buttons and Blog Post Tags
26/10/2022
The most complicated part of making this website was undoubtably using JavaScript for the functionality of the read-more/read-less buttons on these posts and the tags to filter posts by. Although I did find lots of examples of code online which I could have copied, pasted, and slightly altered to get this functionality, I wanted to learn and write the JS myself. What I came up with might not be the most efficient way of getting these buttons to work, but it does work!
In explaining this I am going to use a simplified version of the code just to avoid taking up loads of space, but if you want to read the full version you can find the source code to this site on my GitHub, which is linked in the navigation bar.
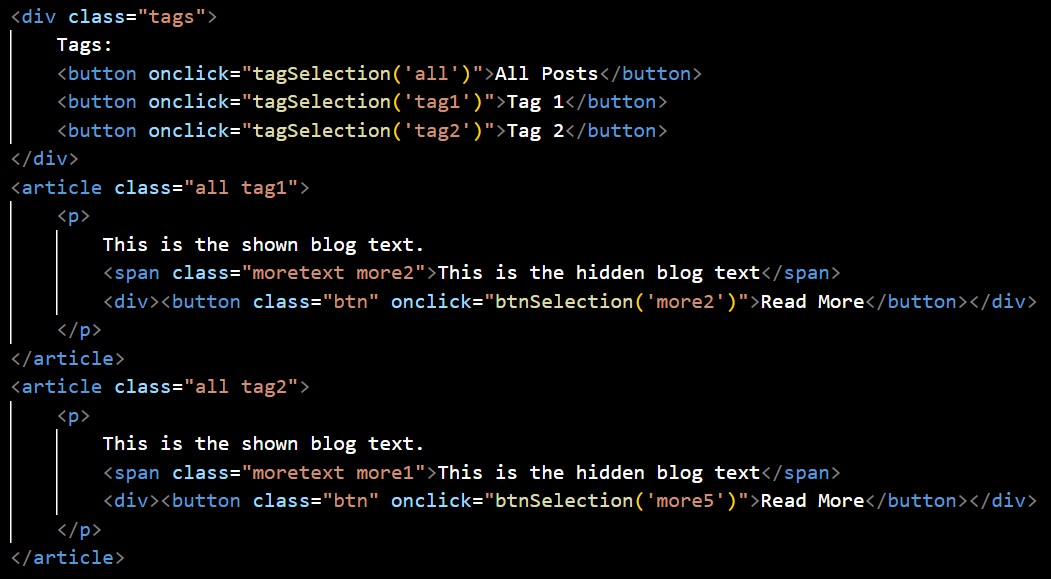
(There is an error in the code above: on the second more/less button the line should read "onclick=btnSelection('more1')", not 'more5'.)
Blog Post Tags
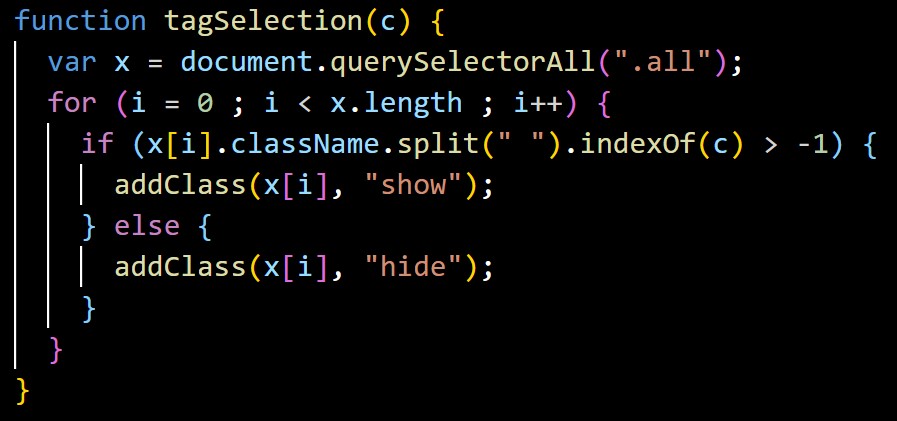
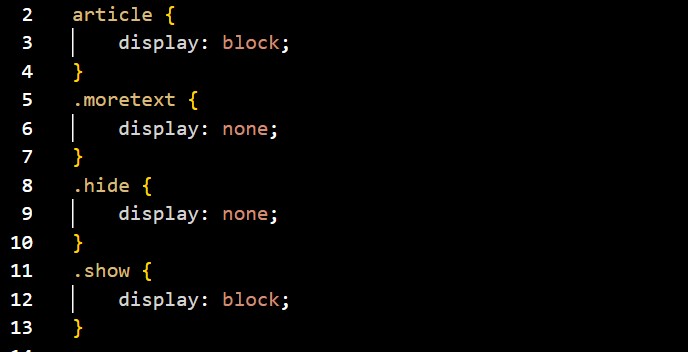
Above you can see simplified versions of the html and css for a blog page. Ultimately how you style the buttons and content doesn't matter, so the only focus of this is the classes I have assigned to each html tag, and the classes .show and .hide in the css. For the blog post tags, on clicking on the tag the user initiates the function tagSelection(c) where c is the tag which this clicked. The purpose of this function is very simple. It just needs to add the class .show to all blog posts with the class "c", and add the class .hide to all blog posts without the class "c". For example when you click 'Tag 1', you initiate tagSelection('tag1'), which hides all blog posts without "tag1" as a class, and shows the ones with "tag1" as a class. Inside the function tagSelection(c) we initially define a variable x, which is a NodeList (sort of like an array) of all the classes attributed to each blog post.
I use document.querySelectorAll(".all") since every blog post has the "all" class, and querySelectorAll exactly returns the classes included with "all". The NodeList (x) hence has as many nodes as there are blog posts.
So for the first post, x[1], the node is article.all.tag1 and for node 2 it is article.all.tag2.
Moving on then to the for loop, this just cycles through each node one at a time, and of each node the if statement asks if "c" (the tag we selected) appears in that node.
If it does then we add .show to that blog post, if it doesn't we add .hide.
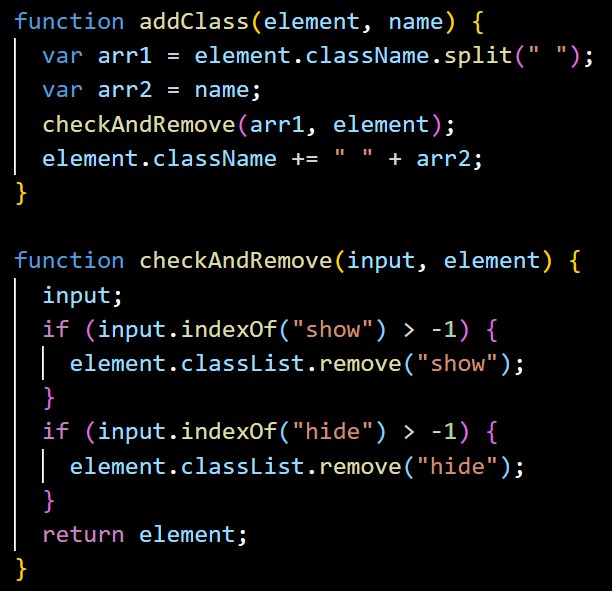 Adding the classes "show" and "hide" respectively was not hard, 'element.className += " " + arr2;' is the only line needed to do this, where 'element' is 'x[i]' and 'name' is either "show" or "hide".
The problem I found from here, however, is that if the user wants to click on another tag after clicking the first one, all the posts now already have the class "hide" or "show" added, which will affect which posts show/hide in this second click.
To solve this problem I created the function checkAndRemove, which checks for "show" and "hide", and removes them if they appear.
The important objects to take away from this are:
- document.querySelectorAll(".all") : which gets all the classes of the element with the class "all";
- .split() : which splits our NodeList into individual strings;
- .indexOf() : which checks if the string "c" == one of our node strings, if it does it returns the position of c in that node, else it returns -1.
Read More/Read Less
The read-more/-less buttons work on much the same principle as the blog post tags.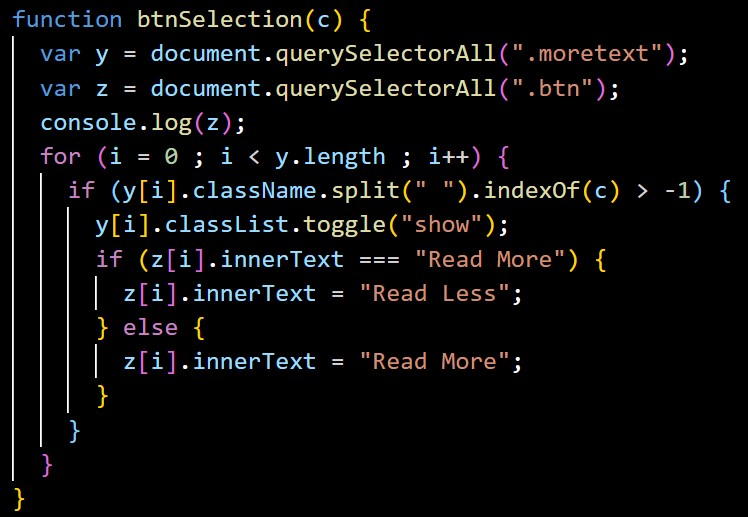 First btnSelection(c) is initiated by a click, on which a for loop asks if each of the possible spans which are hidden are equivalent to the "c" that was clicked.
When it finds the one that does contain the class "c" it toggles show.
Then it changes the inner text of the button corresponding to the span that has been shown.
There is only one important take away from this:
- .innerText : allows us to check and change the inner text of an element.

